Amazon Virtual Private Cloud (VPC) is a service that enables you to deploy AWS resources within a network that is completely isolated and customized according to your needs. With VPC you have control, over your networking environment allowing you to choose the IP address range create subnets and configure route tables and network gateways.
What are the benefits of using an AWS VPC?
Reduced downtime and inconvenience
Reduced risk of data breaches
Flexibility
Cost-effective
How do I create an AWS VPC?
Most users prefer to use the AWS Management Console to create a VPC. Here’s how to set up your VPC step-by-step:
Step 1: Go the AWS management console and search for VPC and select it.

Step 2: Click on Create VPC

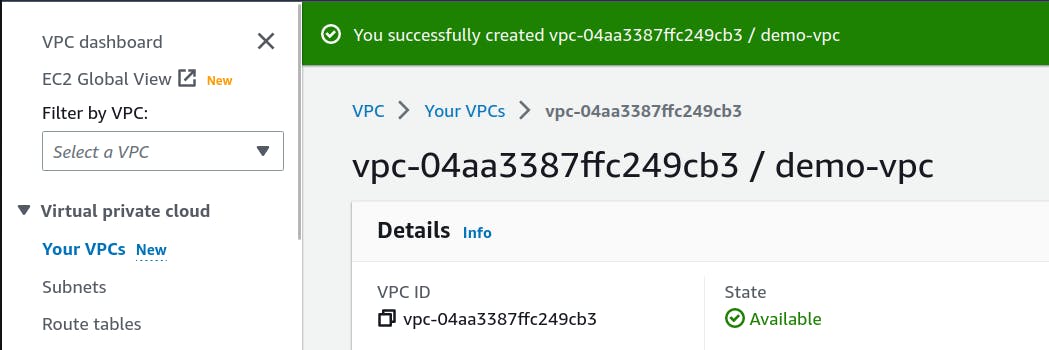
Step 3: Under the VPC setting select the vpc only, give the name of the VPC and set the IPv4 CIDR for na and click on the Create VPC. For now say Name: demo-vpc IPv4-CIDR: 10.0.0.0/16


Step 4: Now, select the Subnet on the dashboard column.

Step 5: Click on Create subnet and select the VPC created earlier, which is
(demo-vpc)

Step 6: Give the name of the subnet and set the IPv4 CIDR block and click the create subnet.

Step 7: For creating a private subnet give the name and set the CIDR block such that it doesn't overlap and click the Create subnet.

now you can see the available subnet.

Step 8: Now go to the Route tables under the Dashboard.

Step 9: Now Create the route table and Name the table for the public subnet set the name and select the VPC created earlier.


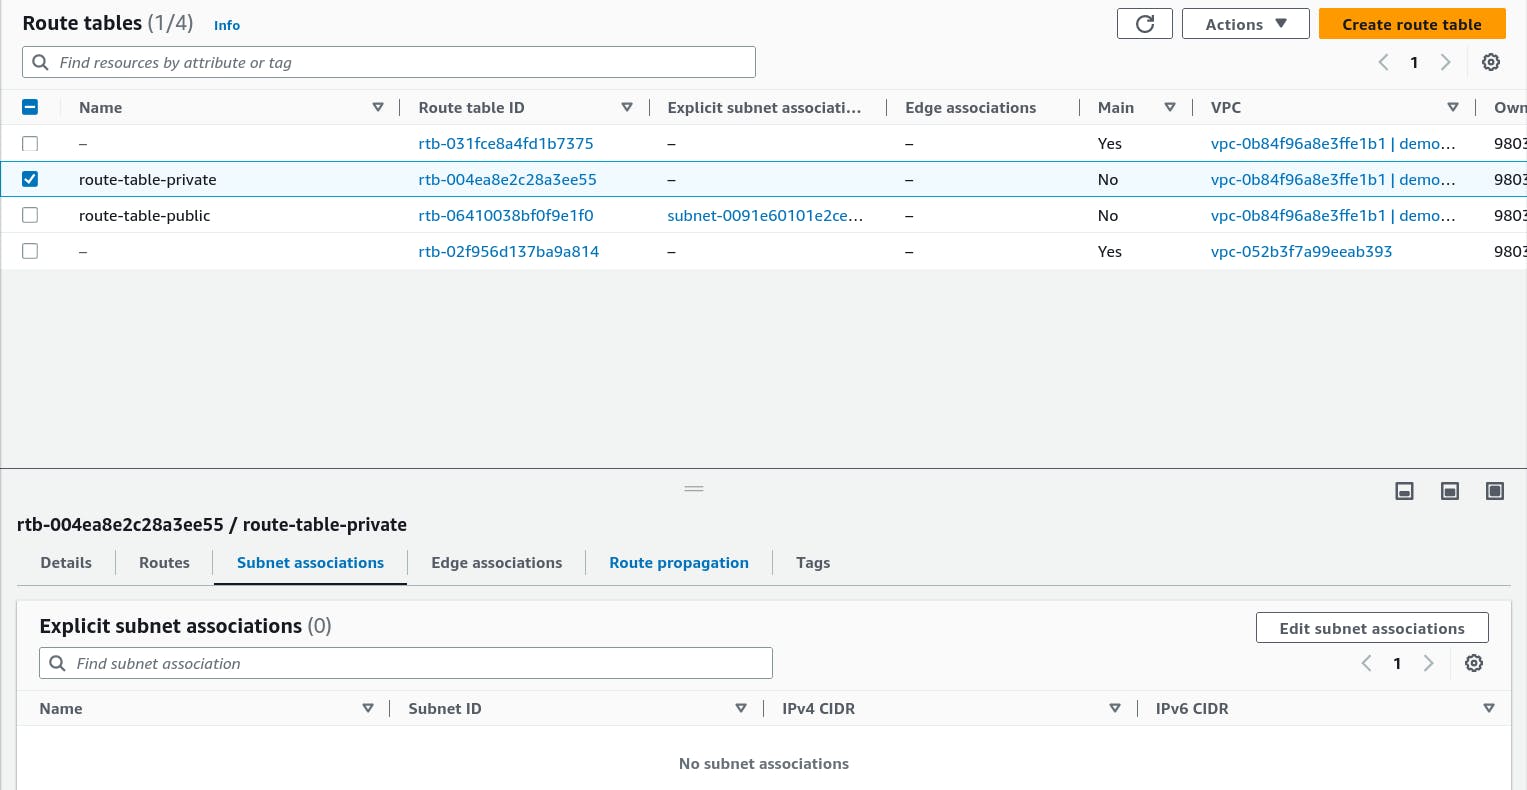
Step 10: For the private subnet again, create the route table give a name and select the VPC created earlier.

Step 11: Select the Internet gateways from the Dashboard and Click on Create Internet gateway in the top right corner.

Step 12: Give a name for the Internet gateway settings, this is created to connect our VPC to the Internet.

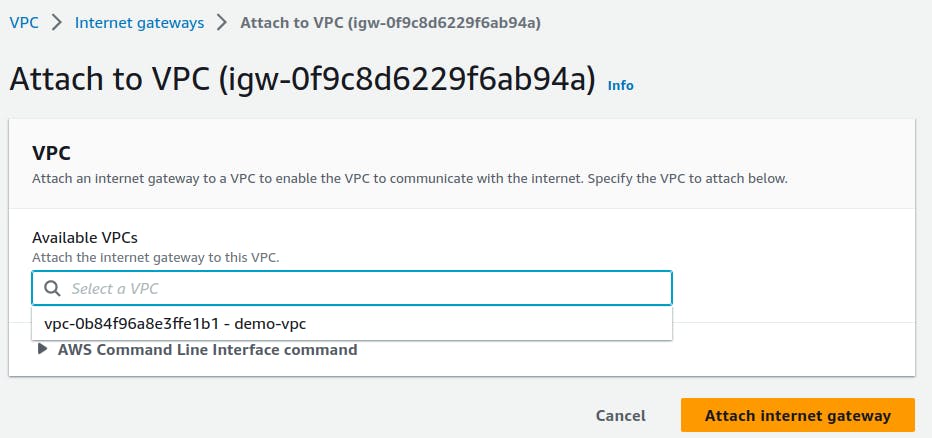
Step 13: At the top right corner Click on Attach to a VPC and under Available VPCs select the with the name demo-vpc created earlier and click on Attach internet gateway.


Step 14: From the Dashboard Click on NAT gateways and on the top right corner Select the Create NAT gateway

Step 15: Under the NAT gateway settings, give a Name to the NAT, under Subnet Field Select a Public subnet created earlier and, on Connectivity type select Public
under Elastic IP allocation ID click on the Allocate Elastic IP button. And Create NAT gateway at the end.

Step 16: Go to the Route table and firstly select the public route table we created earlier.

under the Routes click Edit routes button on the right side of Routes.

Select the Add route and under Destination Select 0.0.0.0/0 and under Target select Internet Gateway that we created since we are targeting any traffic that needs to go to the internet to the IGW and Save changes.

now select the Subnet associations next to the Routes and click on the Edit subnet association under Explicit subnet associations and select the public subnet created earlier and Save associations.

Step 17: Go back to the Route tables and select the private route table and click on the Edit routes.

Under the Destination select 0.0.0.0/0 and under Target select NAT Gateway and Save changes.

Click the Subnet associations and under Explicit Subnet associations click on Edit subnet associations.

select the private subnet we created earlier and save associations.

Step 18: Under the search bar search EC2 and click on it.

Step 19: Click on the Launch Instance

we are creating two instances public and private instance.
Step 20: For the first instance give a name to the instance say instance-public

Step 21: Create a key pair for now we named it randomkey

Step 22: Under the Network settings Click on Edit

Select the VPC created earlier and under subnet field select the public subnet.
Enable the Auto-assign public IP

Step 23: Launch the Instance

Step 24: we are creating a private instance for that click on Launch instance

Step 25: Name the instance for now we name it instance-private.

Step 26: You can select the same key pair or you can create a new one. For now we use the same key pair "randomkey"

Step 27: Under the Network settings Click on Edit.

Select the VPC created earlier we have "demo-vpc" , on Subnet select the private-vpc and Enable the Auto-assign public IP

Step 28: You can see the two instances now, select the public Instance which Status is 2/2 check passed. we have "instance-public" and click on Connect.

Copy the Command from the SSH client

Open the Terminal and change directory where your key-pair is
cd Downloads
change the permission of the key-pair.
chmod 400 randomkey.pem
connect to the public-instance
ssh -i "key-pair_name.pem" ec2-user@<Public IP>

you can ping to google to see if there's a connection established.
ping google.com

Connecting Private instance from public instace
you need to note down the Private IPv4 addresses
open the keypair file and copy the text.

create a file and paste the copied keypair text inside and save and exit.
change the file permission
chmod 400 filename.pem
connect the instance using private ip address.
ssh -i filename.pem ec2-user@<private_ip_address>


you can ping to see the Private instance is connected to internet or not .
ping facebook.com
you have done it.
CONGRATULATIONS!!!
© 2023, Amazon Web Services, Inc.

