Migrating Data using AWS Storage Gateway in File Gateway mode and Enabling Cross Region Replication between Buckets.
I'm AWS Certified Solution Architect. I do write about the AWS Cloud Operation, Migration, Security and Automations.
Introduction:
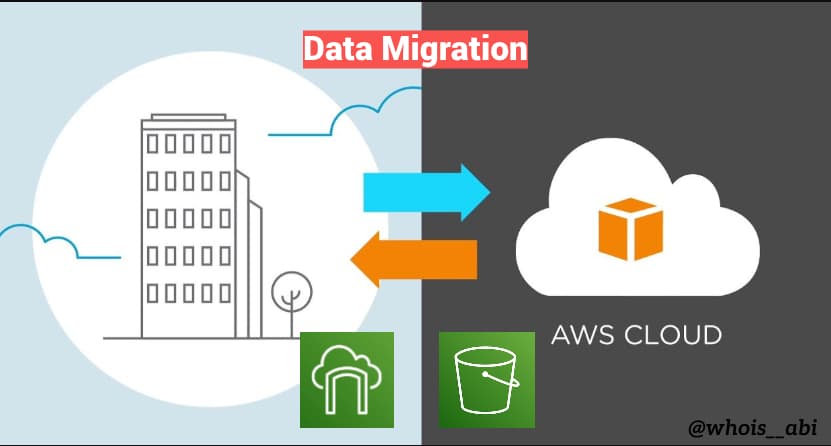
Data migration and disaster recovery are key considerations for building resilient cloud architectures. A common requirement is to migrate data from an local machine to a primary Amazon S3 bucket, while ensuring that the same objects are automatically replicated to a secondary bucket in another AWS region. This setup not only simplifies data migration but also provides high availability, durability, and cross-region redundancy without manual intervention.
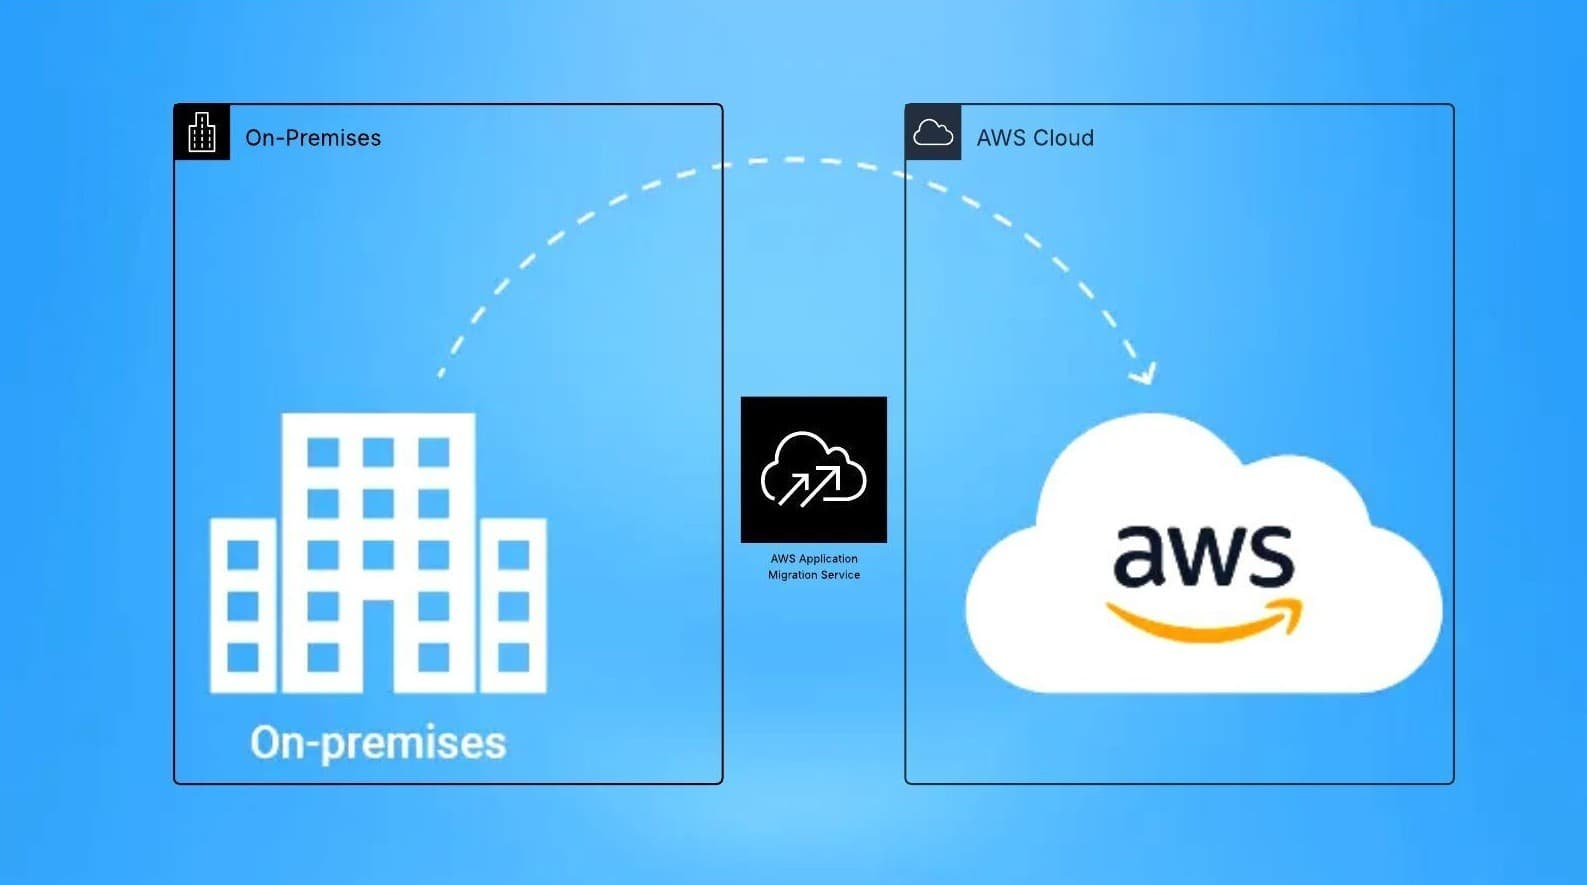
Architecture Diagram:

Procedures:
Step1: Login to your AWS Management Console and change the region to us-east-2.

Step2: Create two S3 Bucket in different regions and enable versioning for cross region replication.
We name the Primary Bucket “abisbucket” in AWS region “us-east-2”
Secondary Bucket be “abisbucket101” in AWS region “us-west-2”

- Bucket versioning Enable.

- Similary, Create another bucket.

Step3: Creating Replication Rule to the Primary Bucket.
Select the primary bucket named, here “abisbucket“
Navigate to the Management tab
Navigate to Replication rules and
Click create replication rule.
Enter the Name for Replication rule. eg: “crr-full-bucket“
keep the Status Enabled.

Under the Source bucket, Apply to all objects in the bucket
From Destination Section, Choose the bucket in this account
Browse S3 Bucket that you have created as Secondary.

- Under IAM role, Select Create new role or if you have already created an Role Choose existing IAM roles.

For now we have just created an bucket and doesn’t contains any objects so choose Not to replicate existing objects.
Click on Submit.

Step4: Checking whether CRR is Successful or Not.
Upload an file to the Primary Bucket “abisbucket“
Navigate to the Seconday Bucket “abisbucket101“, You should be able to see the objects uploaded in the primary bucket.


Step5: Setting up Storage Gateway
In your Management console type Storage Gateway on the search box and click it to open.
Click on create gateway
Enter the Gateway name , For now “File Gateway“
Under Gateway options, Choose Amazon S3 File Gateway.

Select Amazon EC2 from Platform options.
Choose Customize your settings from the Launch EC2 instance.

- Click on Launch instance under Set up gateway on Amazon EC2

Step6: Fill out the details to create an instance.
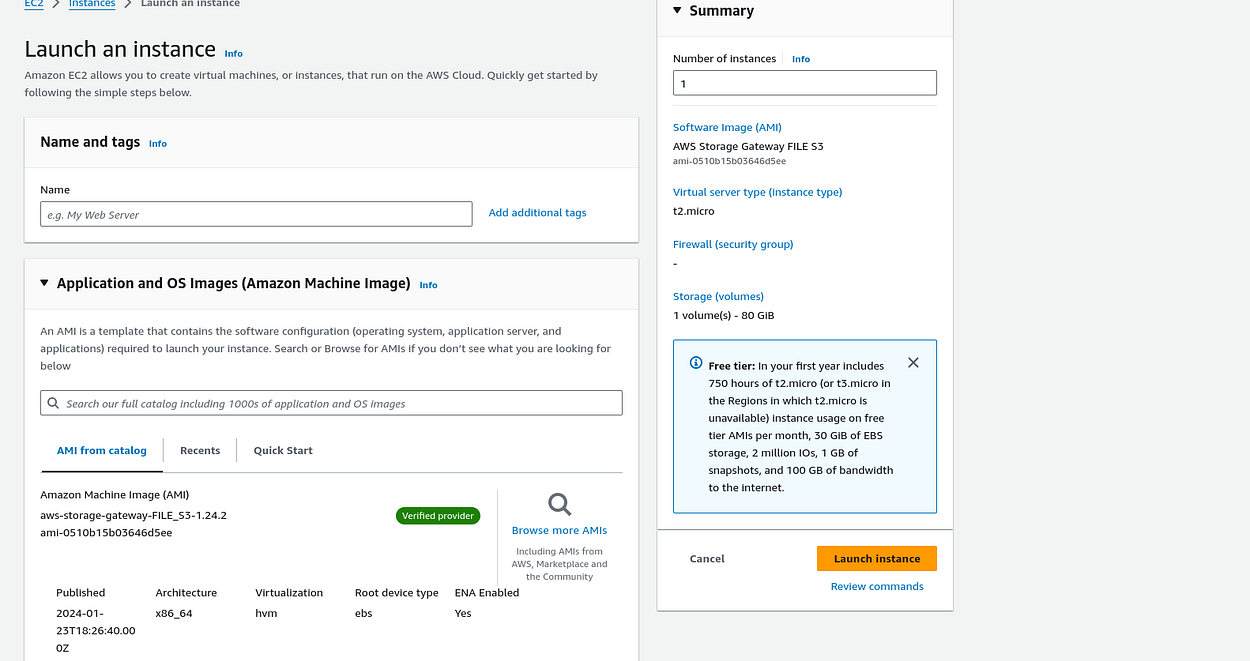

Enter the name of the instance (you can choose any name),
for the AMI it is automatically selected for you,
on the instance type select t2.micro,
on the key pair you can proceed with vockey or just proceed to create your own,
on the network settings I would prefer you use a VPC that you have already created and make sure to enable elastic IP address,
choose the security group associated with the instance,
if the volume is not enough go ahead and add a new volume so that your data will be able to fit without any disruptions,

after doing all of this go ahead and review all the settings and if everything is looking good
launch the instance.
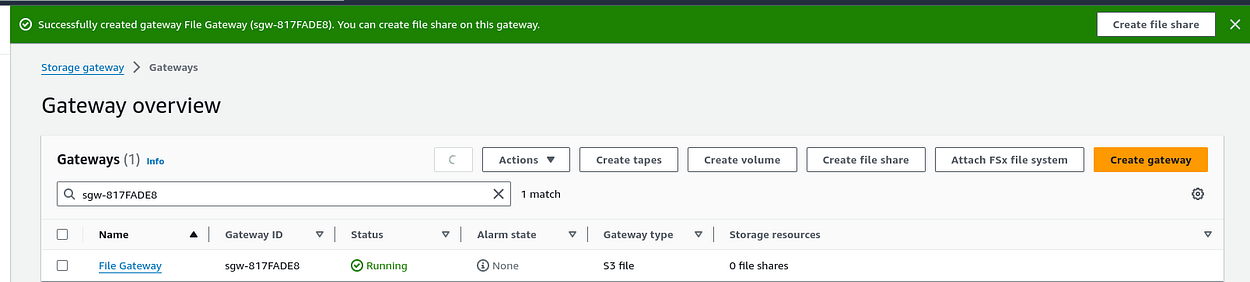
You will receive a sucess message that your instance has been created successfully.
Your instance is going to take a few minutes to initialize. Monitor the deployment until the status check to complete.

Copy the above instance Public IP address.
On the Gateway Tab on Step2 , Select IP address connection options and Paste the copied instance public ip address.

- Choose Publicly accessible in the Endpoint options.

- After all of this choose next and review and activate settings and choose activate gateway. You will receive a success message as the on below and make sure the status is running.

Step7: Create file Share
- After successfully creating the File Gateway and the status is displaying running the proceed and create file share at the top right hand side. You will happen to see the page below.
- Select the Name of the Gateway you just created

- On the S3 bucket choose the primary bucket that you had already created, then choose customize configuration or you can go right ahead to create file share.

- For the file share protocol, I will use NFS since am using Linux and my instance is also Linux,

- You can see the File share has been created successfully and added to the gateway.

you have successfully created a storage gateway and you are almost there, it should be running just fine.
Now,
We need to mount the file share to Linux instance for migrating the data.
Step8: Connect to on premises instance and migrate the data to S3.
- Create the directory that will be used to synchronize data with your S3 bucket.
ssh -i </path/to/key-file> ec2-user@<ip-addess>
sudo mkdir -p /mnt/nfs/s3
- Then mount the file share on the Linux instance by using the command that you located in the Storage Gateway file shares details screen at the end of the last task.

sudo mount -t nfs -o nolock,hard 10.10.1.98:/abisbucket [MountPath]
#example:
sudo mount -t nfs -o nolock,hard 10.10.1.98:/abisbucket /mnt/nfs/s3*
#view if the bucket is mounted to your instance mountpoint
df-h
#copy the data to the mountpoint
cp -v <file/Path> </mountpoint>
#example
cp -v /media/data/* /mnt/nfs/s3

Step9: Confirming Migrations
Check whether the data have been migrated to the primary S3 bucket and also to the secondary bucket form the primary bucket.
To verify that your data has been migrated you can go back to the management console and search for S3.
Select the Primary Bucket “abisbucket“
you can see the files migrated to the bucket form the instance.

- Now, select the Seconday Bucket “abisbucket101“

- you can see all the objects have been replicated from the Primary Bucket.

Conclusion:
we have successfully migrated data to Amazon S3 by using AWS Storage Gateway in File Gateway mode. Being a hybrid storage solution AWS Storage Gateway is a highly adaptable solution. It can serve a broad range of use cases, from primary backups and disaster recovery to comprehensive data migrations or cloud resources for various workloads.